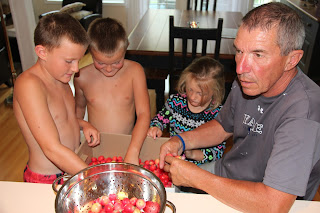
The Calgary Crew were visiting Grandmaman and Grandpa at their new house for their annual summer camp week and found a wonderful crabapple tree.
All three kids took a trip up the ladder to pick the crabapples and then Grandpa finished the job.
Once the apples were picked they needed to be sorted to take out the leaves and the ones that had bad bits on them.
While Ethan continued to help Grandpa sort the rest of the apples Tristan and Reegan got the apples washed.
We cooked the apples on Grandmaman's new gas stovetop and then began the slow process of straining the mush to get nice clear juice. (6 cups water/dutch oven of apples)
 |
| We tried cheesecloth (above) and a jelly bag (below). |
The next morning we went to Pat's house, Grandmaman and Grandpa's new neighbor, where Pat graciously demonstrated how to make the juice into delicious jelly and how to preserve it in glass jars.
Here you see Pat measuring 8 cups of juice and adding 6 cups of sugar.
Next step was boiling the juice until the gel stage. Apparently if you lay a wooden spoon over the top the boiling liquid won't boil over.
Voilà, jars of jelly ready to go in a hot bath.
Here you see Pat putting the jars into the canner.
A big thank you to Pat for sharing her expertise and another to Grant for showing the kids his collection of model airplanes.
STEP 1 PREPARE THE JUICE FIRSTPrepare crabapple juice by washing crabapples. Fill dutch oven with crabapples and cover with 6 cups water. Bring to boil and simmer for about 30 minutes. The crabapples can be mashed a bit during this process but don't mash tooooooo much.
Cool slightly then strain the juice. I found it worked great to strain first through a colander, pushing down a bit to hurry the process but then to put that juice through the jelly bag. Too much mashing and squeezing can make the juice cloudy.
STEP 2 PREPARE THE JELLY
8 cups crabapple juice
6 cups sugar
(1 cup juice use 3/4 cup sugar)
Boil the juice for a couple of minutes and then add the sugar. Continue to boil for between 10 to 25 minutes. Do the gel test after about 10 minutes
Gel tests
1) Temperature Test-around 220 F
2) Spoon-Dip a dry metal spoon into boiling jelly. Lift a small portion of juice in spoon above steam from the pot, letting it cool for a few seconds. Turn the spoon so the jelly drips off side of spoon into pot. The jelly is done when the syrup forms two drops that flow together and sheet or hang off the edge of the spoon to fall as one drop.
3)Frozen plate-Put a little juice on a frozen plate. Put the plate back in the freezer for a couple of minutes and see if the gel crinkles.
STEP 3 PRESERVING THE JELLY IN GLASS SEALING JARS
(Alternate method would be to put in freezer jars and freeze.)
When jelly is ready skim the scum.
Ladle jelly into hot sterilized jars and seal using the following method.
To prepare the jars put clean jars in a 250 degree oven (filled with hot water to prevent cracking) until ready to use to sterilize.
Boil the lids for 5 minutes.
Fill the jars with jelly, place lid on and screw on top not quite tight.
Put jars in boiling water in a canner, covering to 1/2 inch of water and boil gently --for 2 cups 20 minutes--1 cup for 15 minutes.
STEP 4 ENJOY THE JELLY
Click crabapple for a lots of good tips on crabapple jelly making.


No comments:
Post a Comment